
19 min read ·
How to Choose and Replace the Right Battery for Your Mazda 3
The correct 12-volt battery can change with model year, engine, trim, market, body style, terminal layout, hardware and i-Stop equipment.
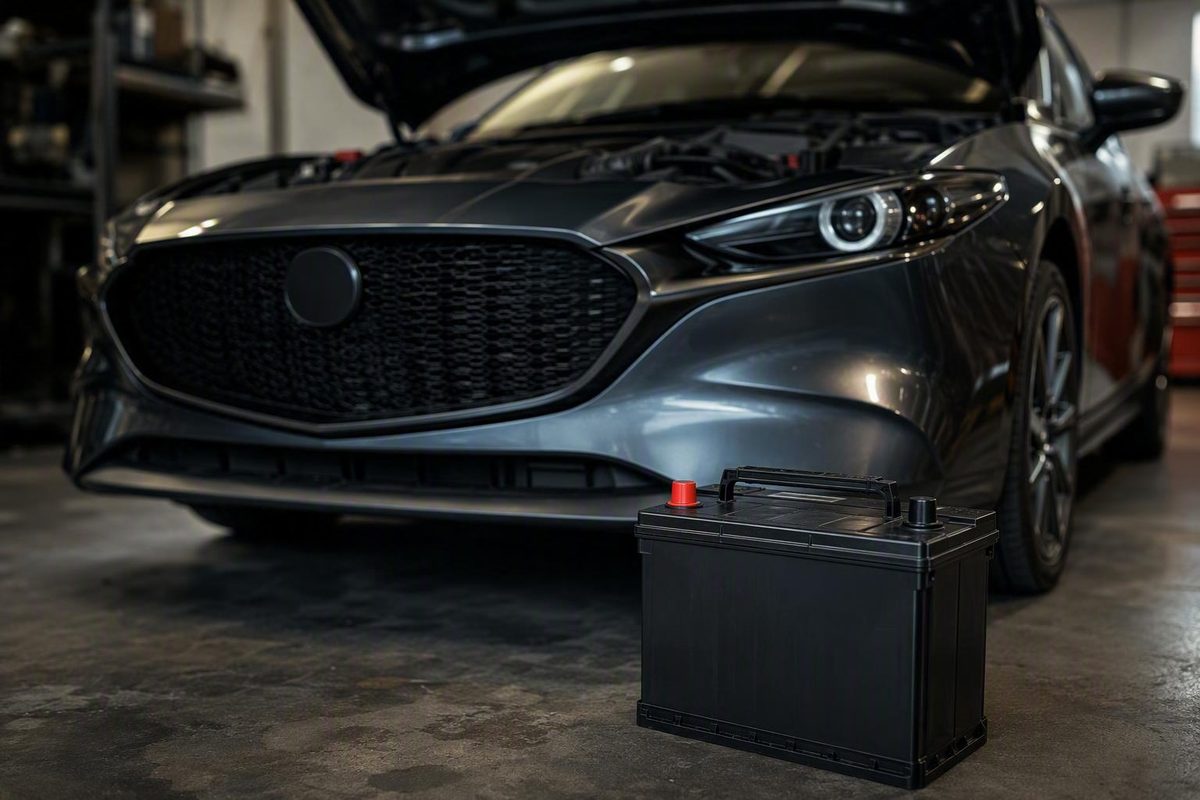
Mazda 3 car battery replacement begins with fitment—not with the cheapest battery on the shelf or the first result in an online catalog. The correct 12-volt battery can vary with model year, engine, trim, market, body style, terminal layout, mounting hardware, and equipment such as i-Stop or another specialized charging system.
This is a fitment-verification and general replacement-safety guide. The available evidence does not provide official Mazda specifications covering every configuration, so it cannot name one universally correct battery or replace the owner’s manual, VIN-specific parts information, or service documentation for your exact vehicle.
Before buying anything:
- Confirm that the battery is the likely problem.
- Record the exact vehicle configuration and current battery specifications.
- Verify fitment through authoritative or fully populated vehicle information.
- Compare battery-only prices with like-for-like installed quotes.
- Decide whether the replacement is safely within your DIY ability.
Confirm the Battery Is Actually the Problem
Common signs of possible battery trouble include:
- Slow or labored cranking
- Clicking during a start attempt
- Dim or flickering lights
- Power windows, locks, or other accessories operating sluggishly
- A battery or charging-system warning
- Intermittent starting after the vehicle has been parked
These symptoms justify inspection and testing, but they do not conclusively prove that the battery must be replaced. Santa Maria Mazda’s general guide identifies slow cranking, clicking, dim lights, sluggish accessories, and dashboard alerts as possible warning signs. It also gives a broad battery-life estimate of approximately three to five years, which is useful context rather than a mandatory replacement interval. Review the dealership’s warning signs and general battery guidance.
Similar symptoms may result from:
- Loose or poorly seated terminals
- Corrosion between a battery post and cable clamp
- Damaged or deteriorated cables
- An alternator that is not charging correctly
- An electrical drain while the vehicle is parked
- Another fault in the starting or charging system
Begin with a visual inspection while the vehicle is switched off. Confirm that the battery is sitting squarely in its tray, the hold-down is present, and the cables appear intact. Look for loose clamps, cracked insulation, heavy terminal deposits, leakage, swelling, or a distorted case. Stop the DIY attempt if the battery is leaking or swollen, corrosion is severe, or wiring is damaged; general battery-safety guidance supports protective equipment, careful handling, inspection, and escalation when the installation is not routine. Read the general battery-selection and handling precautions.
Kelley Blue Book describes sluggish starting as a possible warning sign and gives inconsistent general lifespan summaries—approximately three to four years in one discussion, but potentially longer under favorable conditions elsewhere. Its guidance also identifies physical size, terminal placement, cold-cranking amps, and reserve capacity as battery-selection factors. See KBB’s battery testing, lifespan, and selection discussion.
If you use a shop, ask it to evaluate:
- Battery condition and state of charge
- Terminal and cable connections
- Charging-system operation
- Whether an electrical drain is causing repeated discharge
The supplied evidence does not establish universal testing thresholds for every Mazda 3, so this guide does not provide voltage, load-test, or parasitic-draw limits. A qualified test is preferable to replacing a battery solely because it is several years old.
If the Mazda 3 repeatedly discharges, remains difficult to start after replacement, or continues to display battery or charging warnings, seek diagnosis instead of buying another battery.
Use an Exact-Fitment Check Before Buying
Fitment warning: There is no single battery size or specification established here for every Mazda 3. Group numbers shown in general guides or retailer categories are starting points for research—not universal fitment answers.
Complete this worksheet before shopping:
| Vehicle detail | Information to record |
|---|---|
| Model year | Exact year |
| Body style | Sedan or hatchback, where relevant |
| Engine | Displacement, fuel type, and applicable designation |
| Trim or submodel | Exact trim shown in vehicle or registration information |
| Market | Country or sales region |
| Start-stop equipment | Whether the vehicle has i-Stop, start-stop, or another specialized system |
| Existing battery | Brand, part number, chemistry, group designation, CCA, reserve capacity or amp-hour rating |
| Physical fit | Case dimensions, terminal positions, polarity, and hold-down arrangement |
Examine the existing battery before removing it. Photograph or transcribe:
- Battery technology or chemistry
- Group designation
- Cold-cranking amps
- Reserve capacity or amp-hour rating
- Part number
- Warning labels
- Positive- and negative-terminal positions
- Hold-down design
The installed battery is only a cross-check.
Verify the final requirement through one or more of these sources:
- The owner’s manual for the exact model year and market
- Official parts information using the vehicle identification number
- Authoritative service information for the exact configuration
- A reputable fitment catalog populated with the full year, submodel, and engine
- A parts counter or service provider that checks the complete vehicle configuration
Retail category placement is not proof of compatibility. AutoZone’s Mazda 3 category displays batteries in groups 26R, 35, and 47/H5, but its listings instruct shoppers to check whether each battery fits the selected vehicle. Walmart similarly requests year, make, model, submodel, and engine information and shows multiple sizes and sponsored products within the broader category. See the vehicle details requested by Walmart’s Mazda 3 fitment tool.
General guidance sometimes mentions group 35 or 26R for a Mazda 3, while some retailer results include group 47, also called H5. None is proven universally compatible across all years, engines, markets, and equipment combinations.
An apparently similar battery can still be unsuitable because of:
- A case that is too tall, wide, or long
- Positive and negative terminals in the wrong positions
- A lower ledge or upper hold-down arrangement that does not match
- Cables that cannot reach without strain
- Insufficient required electrical performance
- Incompatible chemistry or charging characteristics
- Incompatibility with i-Stop or another specialized system
Do not force a battery into the tray, stretch a cable to reach a post, omit the hold-down, or reverse the intended cable routing. If the existing battery conflicts with authoritative fitment information, resolve the discrepancy before purchasing.
A generation-by-generation battery table would create false confidence without complete, configuration-specific Mazda data. Exact vehicle information must take precedence over broad model-category results.
Understand Group Size, Chemistry, CCA, and Warranty
Battery specifications answer different questions. A product is suitable only when the relevant fitment, electrical, and vehicle-system requirements agree.
It may also correspond with features used by the mounting system. The group designation is an important screening tool, but it does not independently confirm chemistry, capacity, charging-system compatibility, or every hold-down detail.
The replacement must meet the vehicle’s confirmed requirement. A larger CCA number cannot compensate for the wrong dimensions, polarity, chemistry, or mounting arrangement.
It provides information beyond initial cranking performance. Match the required reserve capacity—or the applicable capacity specification—rather than selecting solely by price.
Flooded and absorbent glass mat batteries both appear in Mazda 3 retailer results, but the supplied evidence does not establish that either chemistry is acceptable in every configuration.
Authoritative vehicle-specific fitment data takes precedence. After confirming that the currently installed specification is correct, replacing it like for like is a sensible practical approach unless authoritative information supports a change in chemistry or capacity.
Observed retailer examples—not universal recommendations
In an AutoZone Mazda 3 catalog snapshot checked on August 18, 2026, visible examples included:
- Econocraft 26R-E: $99.99, 510 CCA, flooded, three-month warranty
- Duralast Gold Group 35: $209.99, 640 CCA, three-year warranty
- Duralast Platinum H5 AGM: $249.99, 680 CCA, four-year warranty
- OPTIMA Yellow Top D35 AGM: $299.99, 620 CCA, two-year warranty
Every listing still required a vehicle-fitment check. Prices, warranties, inventory, discounts, and store availability can change. Compare the displayed AutoZone battery specifications and fitment prompts.
These examples show why price alone is a poor selection method. The least expensive battery had the shortest listed warranty, but that does not mean one of the more expensive products is compatible. AGM construction, a higher CCA rating, a longer warranty, or a higher price does not independently establish correct fitment.
For each confirmed option, compare:
- Free-replacement period
- Whether later coverage is prorated
- Documentation requirements
- Geographic or retailer restrictions
- Whether labor is included
- How warranty testing is handled
- Whether particular types of vehicle use affect coverage
Ask the questions in this order:
- Is the battery confirmed for the exact vehicle and charging system?
- Among confirmed options, which combination of performance, warranty, availability, and total cost offers the best value?
Do not reverse them.
Mazda 3 Battery Replacement Cost: Battery-Only vs. Installed
Battery-only prices and installed replacement estimates measure different things. A retail shelf price may exclude testing, installation, taxes, diagnostic work, core handling, and any configuration-specific initialization.
In the AutoZone snapshot checked on August 18, 2026, the selected examples ranged from $99.99 to $299.99 and displayed a $22 refundable core deposit. Those figures were tied to the displayed store context, inventory, products, and time; they are not guaranteed current prices for every location. Review the retailer’s displayed prices and core-deposit terms.
A core deposit is an additional amount collected when the replacement is purchased. It is generally refundable when the spent battery is returned according to the seller’s conditions. Do not assume every retailer charges $22, uses the same deadline, or follows the same refund process.
Professional estimates can be substantially higher than battery-only prices. In a KBB estimate checked on August 18, 2026 for a 2023 Mazda3 near ZIP code 20170, the displayed figures were:
| Service type | Estimated total |
|---|---|
| Fair repair range | $353–$427 |
| Dealer | $363–$427 |
| Independent shop | $353–$415 |
The dealer estimate divided the total into $236–$278 for parts and $127–$149 for labor. These are local, model-year-specific estimates rather than nationwide pricing. Review KBB’s 2023 Mazda3 estimate for ZIP code 20170.
For a 2020 Mazda3 near the same ZIP code, KBB displayed:
| Service type | Estimated total |
|---|---|
| Fair repair range | $377–$456 |
| Dealer | $388–$456 |
| Independent shop | $377–$444 |
The dealer breakdown showed $252–$297 for parts and $135–$159 for labor. This estimate was also checked on August 18, 2026 and remains a local snapshot rather than a national standard. Review KBB’s 2020 Mazda3 battery replacement estimate.
Santa Maria Mazda’s general dealership-authored guide gives a broader installed estimate of $150–$300, including parts and labor. That less vehicle-specific range conflicts with the higher KBB examples and may reflect different batteries, labor markets, service scope, or pricing methods. It should not be treated as a guaranteed Mazda 3 price. See the dealership’s general cost estimate.
A professional total may reflect:
- Battery testing
- Charging-system checks
- Removal and installation labor
- Terminal or tray cleaning
- Shop supplies
- Core or recycling administration
- Warranty support
- Taxes and environmental fees
- Fault-code scanning
- Configuration-specific initialization or diagnosis
When requesting quotes, ask each seller or shop to identify:
- Confirmed group size and physical fit
- Battery chemistry
- CCA and capacity
- Brand and part number
- Warranty duration and type
- Battery price
- Labor charge
- Core deposit and refund terms
- Disposal or recycling charges
- Taxes and shop fees
- Testing included before and after installation
- Any registration, initialization, code clearing, or diagnostic work included
A $200 quote for one battery specification and a $400 quote for a different specification with testing and diagnostic work are not necessarily prices for the same job. Compare identical batteries and service scopes before deciding which offer provides better value.
Decide Whether DIY Replacement Is Appropriate
The following procedure is general 12-volt battery guidance. It is not an official Mazda service procedure for every model year, engine, trim, or market.
DIY replacement may be reasonable if you can:
- Confirm the replacement specification
- Reach the battery without unfamiliar disassembly
- Identify polarity confidently
- Use the required tools safely
- Lift and carry the battery while keeping it upright
- Reinstall the hold-down correctly
- Confirm any vehicle-specific post-installation requirements
Prepare:
- A battery confirmed for the exact vehicle
- Eye protection
- Protective gloves
- An appropriate wrench or socket set
- A battery-terminal cleaning brush
- Suitable corrosion-control and cleanup materials
- A safe method for transporting the old battery
- Instructions for the exact configuration
Morrie’s Inver Grove Mazda describes a 10 mm wrench or socket as common for Mazda battery work, but its guide is general and does not prove that one tool fits every Mazda 3 terminal clamp and hold-down fastener. Inspect the hardware or consult the correct service information before beginning. See Morrie’s general Mazda tool and replacement guidance.
Park on a level surface, apply the parking brake, switch off the vehicle and electrical loads, and remove the key or keep the keyless transmitter away as appropriate. Wear gloves and eye protection, work in a ventilated area, and keep flames, sparks, cigarettes, tools, and other conductive objects away from the terminals. Do not bridge the terminals or allow a tool on the positive connection to contact vehicle metal. Review general battery-installation safety precautions.
Plan how you will lift and transport the battery before releasing the hold-down. Keep it upright and obtain help if you cannot lift it without losing control.
Stop and seek professional help if you find:
- Uncertain battery fitment or polarity
- Leakage or swelling
- Severe terminal or tray corrosion
- Damaged cables or split insulation
- Access requiring unfamiliar component removal
- A missing or damaged hold-down
- An inability to lift or secure the battery safely
- Uncertainty about i-Stop or another electronic procedure
- Persistent warning lights or a suspected charging fault
This guide does not recommend a memory saver. The supplied evidence contains no authoritative Mazda-specific procedure for connecting one safely across every Mazda 3 configuration. Do not improvise with an external power source.
General Step-by-Step Battery Replacement Sequence
Important limitation: Confirm the owner’s manual and authoritative service information for the exact Mazda 3 before starting. Battery access, fasteners, torque specifications, initialization requirements, and electronic procedures are not established here for every configuration.
1. Verify the replacement one final time
Compare the new battery with the confirmed requirements and the existing installation. Check:
- Case length, width, and height
- Positive- and negative-terminal orientation
- Group designation
- Chemistry
- CCA
- Reserve capacity or amp-hour rating
- Hold-down features
- Compatibility with i-Stop or other specialized equipment
Do not proceed merely because the battery can be placed in the available space.
2. Make the vehicle and work area safe
Switch the vehicle off, apply the parking brake, turn off lights and accessories, and keep the key away as appropriate. Put on gloves and eye protection. Organize tools so they cannot fall across the terminals.
3. Record the existing arrangement
Photograph or note:
- Positive and negative cable routing
- Terminal orientation
- Hold-down position
- Any insulating cover
- Attached brackets or cable retainers
A photograph can help with reassembly, but it is not a substitute for verified fitment information.
4. Disconnect the negative terminal first
Identify the negative terminal carefully. Loosen its clamp with the correct tool, remove the cable from the post, and position it so it cannot spring back into contact.
Negative-first removal reduces the chance that accidental tool contact with vehicle metal will complete a circuit while the positive connection is being handled.
5. Disconnect the positive terminal
Open or remove the positive-terminal cover if fitted. Loosen the clamp without allowing the tool to contact surrounding vehicle metal. Move the cable away without sharply bending or straining it.
6. Remove the hold-down
Remove the bracket, bar, or lower retaining hardware that secures the battery. Keep all fasteners together so they are not lost.
Do not lift the battery while any retaining component remains engaged.
7. Lift the old battery upright
Lift the battery with controlled movement and keep it upright. Place it in a stable, ventilated location while you inspect the tray, cable ends, insulation, and nearby wiring.
8. Address manageable corrosion
Light, accessible terminal corrosion may be cleaned with appropriate battery-terminal materials. Keep residue and cleaning liquid from spreading through the vehicle, and allow cleaned surfaces to dry before installation.
Do not work around severe corrosion, a weakened clamp, damaged insulation, or a visibly deteriorated cable.
9. Position and secure the replacement
Place the confirmed battery in the tray with the terminals in the correct orientation. Reinstall the hold-down and verify that it engages as designed.
The battery must not slide, rock, or lift from the tray. Do not improvise with spacers or an unsuitable retaining device to make an incorrect case fit.
Use the exact hold-down torque in authoritative documentation. No universal value is supplied here.
10. Reconnect positive, then negative
Connect the positive cable to the positive post first and reinstall its protective cover where applicable. Connect the negative cable to the negative post second.
Use the vehicle-specific terminal-clamp torque. Do not guess or assume tighter is safer. General Mazda replacement guidance supports negative-first removal, positive-first installation, inspection for corrosion or damaged wiring, and secure reassembly.
11. Perform a security check
Without touching or bridging the terminal posts:
- Confirm that each cable is seated and does not rotate freely
- Check that the battery cannot move in the tray
- Verify that no tool or fastener remains in the compartment
- Confirm that cable routing matches the original arrangement
- Reinstall any covers removed for access
The broadly supported order is:
- Removal: negative first, then positive
- Installation: positive first, then negative
General battery-installation guidance supports this terminal order, corrosion inspection, upright handling, and securing the battery against movement.
This sequence does not replace vehicle-specific access instructions, torque specifications, or electronic procedures.
Post-Installation Checks, Lost Settings, and i-Stop
After installation, perform a structured check:
- Confirm that both terminal clamps are secure.
- Confirm that the hold-down prevents battery movement.
- Remove all tools and loose hardware.
- Start the vehicle and observe cranking behavior.
- Watch for battery, charging-system, engine, or other warning indicators.
- Listen for abnormal starting behavior.
- Check the clock and radio presets.
- Test the power windows and other convenience functions.
- Observe i-Stop operation if the vehicle is equipped with it.
- Recheck the installation if starting remains weak.
Some settings may require attention after battery power is disconnected. Depending on the vehicle, these can include the clock, radio presets, power-window functions, or other convenience features. Do not assume that every Mazda 3 loses the same settings.
The supplied evidence does not establish that every Mazda 3 requires battery registration, coding, battery-management initialization, fault-code clearing, or an i-Stop reset. It also does not prove that no Mazda 3 requires those procedures.
Owner reports for BP-generation vehicles are inconsistent. Some owners reported performing an i-Stop initialization after replacement, while another reported that no reset was necessary. One owner reported that i-Stop returned after battery-related fault codes were cleared, but that experience does not prove that code clearing is required—or sufficient—for every vehicle. Read the conflicting BP-generation owner reports.
The initialization sequence posted in that discussion is anecdotal owner information, not an official procedure established for every model year, engine, or market. It should not be reproduced or applied as universal Mazda service guidance.
If i-Stop does not operate immediately, observe vehicle messages and consult the exact owner’s manual before assuming a fault. If the feature remains unavailable or warnings persist, obtain configuration-specific service information or professional diagnosis.
Seek diagnosis when:
- Starting remains sluggish with the new battery
- A battery or charging warning remains illuminated
- The replacement repeatedly loses charge
- i-Stop remains disabled or displays a fault
- Other warning lights appear after replacement
- Electrical accessories behave abnormally
- The terminals will not remain secure
Do not repeatedly disconnect the battery, clear codes, or attempt unverified reset sequences in the hope that a persistent problem will disappear. The underlying cause may involve a connection, cable, charging system, control system, or electrical drain.
Return the Old Battery and Know When to Seek Service
A spent automotive battery should not be placed in household trash. Keep it upright during transport and return it to an auto-parts retailer, battery-service location, or approved recycling center.
Retain the purchase receipt and core-deposit paperwork. Confirm:
- The return deadline
- Required proof of purchase
- Whether the battery must go back to the original store
- The condition in which it must be presented
- How and when the refund will be issued
Retailer terms differ, so do not assume a core deposit can be reclaimed indefinitely or at every location.
Professional service should take over if you encounter:
- Leakage or swelling
- Severe corrosion
- Damaged or split wiring
- Uncertainty about polarity or fitment
- A battery that cannot be secured
- Missing or damaged hold-down hardware
- Persistent warning lights
- Repeated battery discharge
- Continued slow or abnormal starting
- Unresolved i-Stop behavior
- A need for configuration-specific registration, initialization, or diagnosis
Replacing another battery without testing may simply repeat the expense.
Frequently Asked Questions
What size battery does a Mazda 3 use?
There is no single battery size established for every Mazda 3. Group 35 and 26R appear in general guidance, while group 47/H5 appears in some retailer listings, but none is universal.
Determine the correct size using the exact model year, engine, trim or submodel, market, body style where relevant, and i-Stop or start-stop equipment. Confirm dimensions, terminal orientation, hold-down design, chemistry, CCA, and capacity. Retail fitment tools themselves request detailed vehicle information rather than treating every visible category product as compatible. Review an example of the required vehicle-fitment fields.
How much does Mazda 3 car battery replacement cost?
In the cited retailer snapshot, selected battery-only examples ranged from $99.99 to $299.99, before the displayed $22 refundable core deposit, taxes, and installation. Installed estimates were higher: KBB displayed $353–$427 for a 2023 Mazda3 and $377–$456 for a 2020 Mazda3 near ZIP code 20170.
Those are time-, location-, model-year-, and specification-sensitive figures. Actual cost depends on the battery, warranty, labor rate, taxes, core handling, testing, and diagnostic or electronic work included. KBB’s 2020 estimate, including its dealer and independent-shop ranges, illustrates why local installed pricing should not be generalized nationally. Check the cited 2020 Mazda3 cost estimate.
Can I replace a Mazda 3 battery myself?
Possibly. A conventional replacement may be manageable if you can confirm fitment, identify polarity, use suitable tools and protective equipment, lift the battery safely, and secure it correctly.
The general procedure is to disconnect negative before positive, remove the hold-down and old battery, install and secure the replacement, and reconnect positive before negative. Stop if you encounter leakage, swelling, severe corrosion, damaged wiring, uncertain polarity, unfamiliar access requirements, or unresolved electronic procedures.
Does a Mazda 3 need battery registration or an i-Stop reset after replacement?
Not necessarily, but the available evidence does not support one universal answer. BP-generation owner reports conflict: some owners reported performing an i-Stop initialization, while another reported that no reset was necessary.
Confirm the requirement for the exact model year, engine, market, and equipment through authoritative documentation or qualified service information. Do not treat a forum reset sequence—or an owner’s experience with code clearing—as an official procedure for every Mazda 3. Review the owner reports and their limitations.
How long does a Mazda 3 battery usually last?
The supplied general guidance varies from approximately three to six years, so there is no guaranteed Mazda 3 replacement interval. KBB describes about three to four years in one section but notes elsewhere that batteries may last longer under favorable conditions.
Use age as context rather than diagnosis. Test a battery associated with slow cranking, repeated discharge, or electrical warnings, and investigate the charging system or a possible electrical drain if the problem returns.
The Fitment-First Action Plan
Diagnose before buying. Record the exact vehicle configuration and existing battery specifications, then verify compatibility through the owner’s manual, VIN-specific parts information, authoritative service data, or a fully populated fitment catalog.
Compare battery-only and installed quotes using the same group, dimensions, terminal layout, chemistry, CCA, capacity, and warranty. If DIY replacement is appropriate, follow the supported negative-first removal and positive-first installation sequence while observing the instructions for the exact vehicle.
Treat i-Stop behavior, battery registration, resets, torque values, and other electronic procedures as configuration-specific questions rather than universal Mazda 3 rules. Seek professional diagnosis when warnings, weak starting, repeated discharge, or i-Stop faults persist.
Above all, remember that careful installation cannot make an incorrectly specified battery suitable.