
9 min read ·
Choose the Right Hardware for a Side-Terminal Battery
Identify bolts, extenders, terminals and adapters; check 3/8-16 vs 3/8-24 threads, usable length, insertion depth, polarity and clearance.
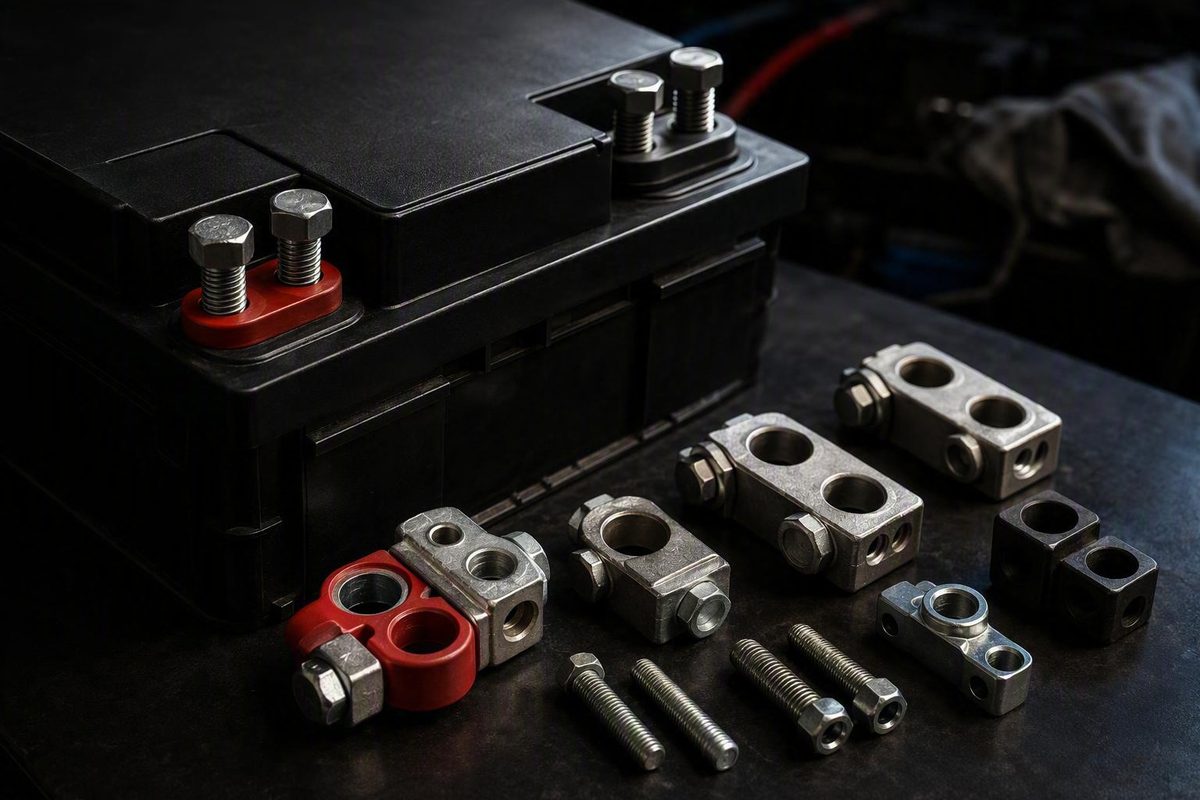
Products sold as a side post battery terminal are not interchangeable. First determine whether you need a replacement bolt, extender, spacer, charging post, complete cable-end terminal, clamp adapter, or side-to-top-post converter. Then verify every specification relevant to that category against the original hardware and authoritative documentation for the exact battery or vehicle. If those records do not establish compatibility, treat the fitment as not confirmed.
Start here: identify the part you actually need
A side-post battery places its cable connections on the side of the case. However, “side terminal” is an umbrella term: supplier catalogs use it for bolts, extenders, spacers, charging posts, complete terminals, and conversion hardware. Visual identification and published specifications are therefore more useful than the product title alone.
| Part type | Purpose | When not to use it |
|---|---|---|
| Replacement bolt | Secures an existing, sound cable end to the battery | When the cable end or battery-side threaded insert is damaged |
| Bolt extender | Typically provides another attachment point or accommodates an added connection | When thread, insertion depth, intended use, or clearance cannot be verified |
| Spacer | Typically changes spacing or connection geometry | To repair stripped threads or restore a damaged cable end |
| Charging post | Adds a positive or negative access point | When polarity or exact fitment is unknown |
| Complete cable-end terminal | Terminates a replacement or custom battery cable | When conductor size, termination method, or electrical suitability is unknown |
| Clamp adapter | Changes the connection to accept clamp-style hardware | As a repair for a damaged direct-fit cable end |
| Side-to-top-post converter | Converts a side connection for top-post use | As though it were an ordinary replacement bolt |
A replacement bolt is appropriate only when the original bolt is defective but the cable terminal and the battery’s threaded insert remain sound. It fastens the existing cable end; it does not replace that cable end.
A bolt extender is generally sold to create an additional attachment point or accommodate another connection. Its intended use must be confirmed from the specific product instructions. The thread, available insertion depth, and installed clearance must also be compatible with the battery, cable routing, hold-down, bodywork, and nearby conductive parts.
A spacer is sold as a separate side-terminal accessory and is typically used to alter connection spacing or geometry. It is not a thread repair.
Charging posts are offered as distinct positive and negative accessories, so polarity is part of the specification rather than merely a color cue. Supplier catalogs also separate spacers, long bolts, extenders, universal cable terminals, and side-to-top-post conversion terminals, illustrating why a generic listing title is insufficient. These categories appear in the Maney Wire & Cable side-terminal accessory catalog.
A complete cable-end terminal is used when building or repairing a battery cable. It must fit the cable conductor and be installed using the appropriate termination method. Buying one is not equivalent to replacing the small bolt retained in an existing cable end.
A clamp adapter or side-to-top-post converter changes the connection format. Use one only when the exact adapter is documented as mechanically and electrically suitable for the intended battery and installation.
Verify the thread, length, and clearance before ordering
Use a specification-first checklist:
- Exact part category and intended function
- Thread diameter
- Thread pitch
- Usable threaded length
- Available insertion depth
- Head, shoulder, washer, and captive-hardware design
- Installed clearance
- Positive, negative, or universal polarity, where applicable
- Cable gauge and actual conductor dimensions, where applicable
- Included quantity
- Exact battery and vehicle fitment
Do not stop after seeing a nominal 3/8-inch diameter. Marketplace listings advertise side-post extension hardware with both 3/8-16 coarse and 3/8-24 fine threads, so diameter alone does not establish compatibility. These are seller-advertised accessory specifications—not proof that either thread fits your battery or vehicle. The mixed Amazon side-post hardware results also show why bolts, extenders, connectors, and adapters must not be treated as one category.
Compare the proposed replacement with the original hardware, including its thread, usable length, head, shoulder, washer, and any captive parts. Record the full battery model plus the vehicle’s year, make, model, engine, and relevant equipment.
Use fitment information in this order:
- Vehicle service information or instructions applicable to the exact vehicle configuration
- Documentation from the battery manufacturer for the exact battery model
- A vehicle or battery manufacturer’s parts catalog
- A parts supplier’s application lookup backed by an identifiable manufacturer part number
- Seller listings only as product descriptions—not as proof of fitment
If authoritative sources conflict, contact the vehicle or battery manufacturer and ask for the approved terminal hardware or part number, thread diameter and pitch, usable length, permitted insertion depth, torque, and any required shoulder, washer, or captive-hardware configuration. If those details remain unavailable, the product is not confirmed compatible.
Socket size and thread size are separate measurements. AutoZone uses an 8 mm tool for the fastener in its illustrated example, but that does not mean the terminal has an 8 mm thread or that every side-post vehicle uses the same tool (AutoZone).
Length requires the same care. Insufficient engagement is not solved by selecting an arbitrary longer bolt. Do not probe or modify the battery-side connection to determine depth; obtain the applicable dimension or approved part number from authoritative documentation.
The correct torque must likewise come from instructions for the exact battery, terminal design, or vehicle. The available sources do not establish one universal torque value for side-post connections.
Before you buy
- Photograph the installed connection from multiple angles.
- Retain the original bolt and compare its thread, usable length, head, shoulder, washer, and captive hardware.
- Record the full battery model and vehicle details.
- Check clearance with the cable routed normally.
- Request the manufacturer part number and fit-critical dimensions if the catalog is incomplete.
- Reject any listing that does not disclose enough information to confirm fit.
Match complete terminals to the cable—not just the battery
A complete side-post cable terminal must fit the cable conductor as well as the battery connection. A replacement terminal bolt only fastens an existing cable end and cannot substitute for the terminal itself.
One seller lists the following large-cable terminal options. These are seller-disclosed dimensions, not a general sizing standard:
| Offered cable size | Displayed conductor inside diameter |
|---|---|
| 2–1 AWG | 9.6 mm |
| 1/0 AWG | 11.6 mm |
| 2/0 AWG | 12.6 mm |
| 3/0 AWG | 13.8 mm |
| 4/0 AWG | 16.2 mm |
The figures come from the CE Auto Electric Supply side-post terminal listing. In the supplied product information, the seller does not state the terminal material, plating, thread specification, current rating, detailed polarity information, included quantity, or a recognized crimp standard.
Before buying a terminal for a custom or repaired cable, verify:
- Actual conductor size rather than cable jacket diameter
- Terminal polarity and connection geometry
- Battery-side thread diameter and pitch
- Terminal material and plating
- Continuous and cranking-current suitability
- Required crimp tool, die, and documented procedure
- Insulation or heat-shrink requirements
- Protective-boot fit
- Cable routing and installed clearance
The terminal, finished crimp, cable, insulation, and protective hardware must all be documented as suitable for the exact application.
Diagnose the connection before replacing parts
A loose or intermittent side-post connection does not automatically mean the bolt is defective. Inspect the complete connection and, where applicable, the cable and ground path.
| Symptom | Next check |
|---|---|
| Visible corrosion | Disconnect safely; clean only as the applicable procedure permits, then inspect for pitting or lost material |
| Connection moves | Check specified torque, thread condition, cable-end deformation, bolt length, and possible bottoming |
| Intermittent power | Inspect both battery connections, cable condition, grounds, and other starting-system faults |
| Stripped threads | Identify whether the damage is in the bolt, cable-end hardware, or battery-side insert |
| Damaged cable end | Replace the terminal or complete cable as appropriate; do not rely on a new bolt alone |
| Problem remains after cleaning | Check for hidden cable damage, poor grounds, incorrect hardware, battery faults, or another electrical problem |
Corrosion or looseness may justify safe cleaning and inspection before buying hardware. Bolt-only replacement is reasonable only when the bolt is faulty and both the cable terminal and battery-side threaded insert remain structurally sound.
Check for damaged threads, a deformed cable end, incorrect hardware, a bolt bottoming before it clamps, or damage within the battery-side connection. A damaged terminal may require terminal or complete-cable replacement.
As a vehicle-specific anecdote, participants in a Chevy SSR side-post bolt discussion reported checking the negative cable’s body and frame grounds; some described replacing a cable rather than only its bolt. Their preferences concerning longer bolts, cleaning, or grease are owner reports—not manufacturer instructions—and should not be transferred to other vehicles or battery designs.
Use the safe disconnect, cleaning, and reconnect sequence
Follow the exact vehicle or battery procedure where it specifies additional precautions, memory-preservation steps, access instructions, or post-installation setup.
- Park on a dry, flat surface and set the parking brake.
- Switch off the ignition and allow a hot vehicle to cool.
- Keep sparks, flames, and smoking materials away.
- Wear gloves and eye protection. Battery work can involve corrosive residue, a heavy component, and short-circuit risk.
- Disconnect the negative cable first.
- Disconnect the positive cable second.
- If removing the battery, release its hold-down and lift it using an appropriate method—never by the cables or terminals.
- Inspect the bolt, cable end, and accessible contact surfaces.
- Clean only the removable cable-contact surfaces and other areas approved by the exact battery or vehicle procedure, using the specified tool. Keep conductive tools from bridging a terminal to grounded metal.
- Do not brush, probe, reshape, or otherwise modify a damaged battery-side insert.
- Replace structurally damaged bolts, terminals, or cables rather than reusing them.
- Reinstall the battery and secure its hold-down.
- Reconnect the positive cable first.
- Reconnect the negative cable last.
- Confirm that the assembled cable ends do not move, then test vehicle operation.
AutoZone’s side-post service guide supports the basic safety precautions, cable order, hold-down installation, cleaning of suitable terminal and bolt surfaces, and post-installation test. Its wire-brush instruction should be applied only where the exact design and service procedure permit it—not as permission to abrade every plated part or battery-side insert.
Use only the documented torque for the exact application.
Shop by specifications, not ratings or universal-fit claims
Compare only products in the category you actually need:
| Product category | Fit-critical information |
|---|---|
| Bolt or extender | Thread diameter and pitch, usable length, shoulder or captive hardware, insertion depth, head clearance, intended function |
| Charging post | Positive or negative polarity, approved geometry, thread, clearance, intended connection |
| Complete cable terminal | Conductor size, thread, polarity, material, plating, current suitability, crimp tooling, insulation, boot fit |
| Clamp or conversion adapter | Documented battery interface, clamp or post geometry, electrical suitability, clearance, exact fitment |
| Spacer | Approved purpose, dimensions, mating hardware, installed geometry, exact application |
Online results mix replacement bolts, extension hardware, connectors advertised for GM side posts, and conversion adapters. Supplier catalogs add spacers, long bolts, polarity-specific charging posts, universal cable terminals, and side-to-top-post converters. That variety demonstrates product-category breadth, not interchangeability.
Labels such as GM-compatible, universal, sponsored, or Overall Pick do not establish compatibility with a particular battery or vehicle. Ratings, purchase counts, temporary prices, stock status, and shipping speed may describe the shopping experience, but they do not prove thread fit, clamping geometry, electrical capacity, or application suitability.
Broad claims deserve particular caution. For example, a retailer’s two-pack clamp-adapter listing says the adapters fit battery posts but provides no dimensions, thread sizes, electrical ratings, or compatibility table in the supplied information. That is not enough to confirm the product for a specific installation.
Choose the component by function first, then compare it with the original hardware and authoritative records for the exact battery or vehicle. If the seller does not disclose enough information to make that match—or if the threads, cable end, grounds, or battery insert are damaged—do not treat the product as confirmed compatible.