
18 min read ·
How to Identify Your Mercedes Key and Change Its Battery Safely
Depending on the physical fob, you may find a CR2025 or CR2032 battery, and some designs hold two cells rather than one.
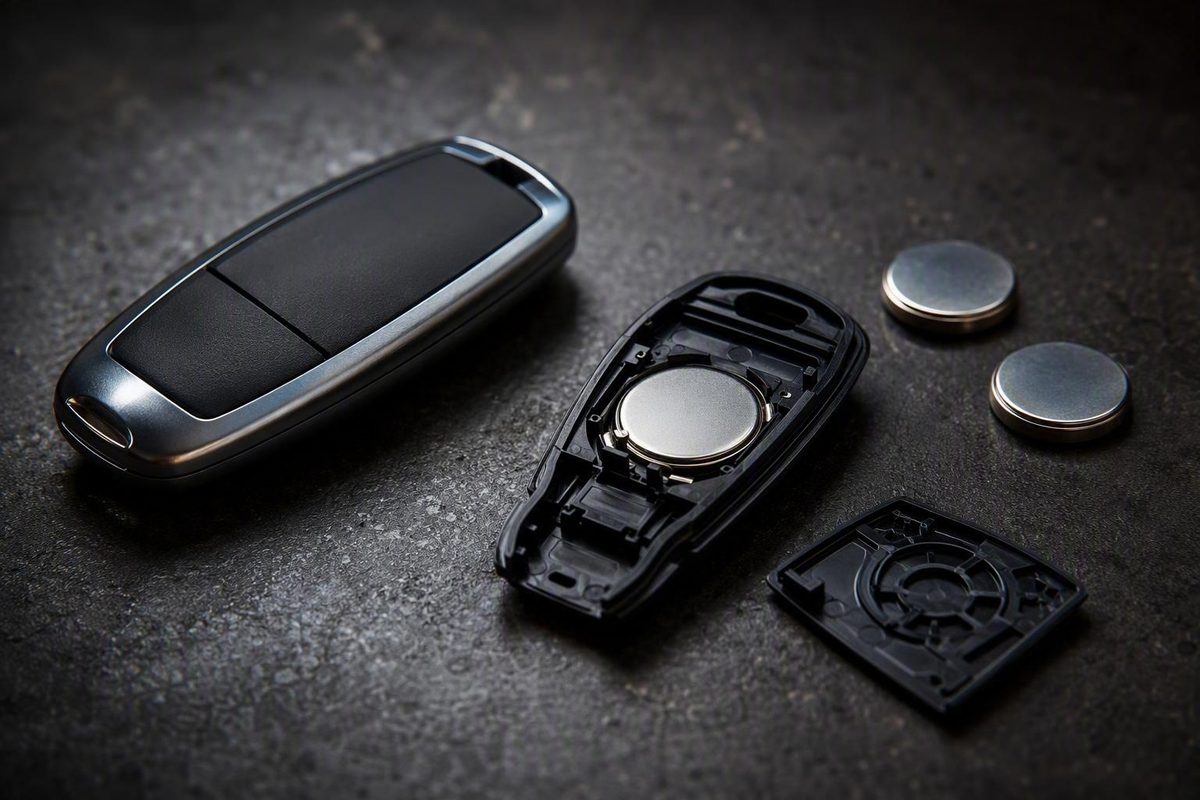
A Mercedes ignition key battery replacement is usually an owner-serviceable task, but there is no universal battery, opening method, cell count, or polarity rule for every Mercedes-Benz key. Depending on the physical fob, you may find a CR2025 or CR2032 battery, and some designs hold two cells rather than one.
The safe approach is to identify the fob itself, open it at its intended release point, and verify the installed battery before buying a replacement. Record the cell count and orientation, then install an exact match without forcing the holder.
This guide concerns the replaceable coin cell inside an electronic key fob—not the vehicle’s 12-volt starting battery. It is independently published guidance, not an official Mercedes-Benz procedure or a model-by-model compatibility lookup. Exact owner documentation, unambiguous compartment markings, or information tied to the key’s part number should take priority when available.
Before You Begin: Confirm That This Is a Key-Fob Battery Problem
The most direct signs of a weakening fob battery involve remote operation:
- Remote range has gradually decreased.
- Lock, unlock, trunk, or panic buttons work intermittently.
- A button must be pressed repeatedly.
- The remote works only when held close to the vehicle.
- The dashboard displays a low-key-battery warning.
- A push-button-start vehicle intermittently reports Key Not Detected.
Reduced range, failed remote buttons, and intermittent fob recognition are among the symptoms identified in Mercedes-Benz of Barrington’s key-battery guidance. These signs make a weak coin cell plausible, but they do not prove it is the only possible cause.
A warning or recognition problem can also result from an incorrectly installed cell, poor battery contact, physical damage, radio interference, or a vehicle-side fault.
Do not treat the following as proof that the key-fob battery is weak:
- The starter cranks slowly.
- Interior lights are dim.
- The vehicle appears electrically dead.
- A charging-system warning appears.
- An inserted ignition key will not turn.
- The engine fails to crank even though the remote buttons work.
Those symptoms justify checking the vehicle’s 12-volt battery and electrical system. A dealership troubleshooting guide likewise identifies a weak vehicle battery, vehicle antennas, and control modules as alternative causes when key recognition fails. See the Mercedes-Benz of Daytona Beach troubleshooting distinctions.
If a spare key is available, test it before opening the primary fob:
- The spare works normally: Focus first on the primary fob’s battery, buttons, contacts, or internal electronics.
- Both keys have poor range in the same location: Consider local radio interference or a vehicle-side problem.
- Neither key works and the vehicle has dim lights or slow cranking: Check the vehicle battery first.
- One key operates the remote but will not authorize starting: The problem may extend beyond the replaceable coin cell.
This comparison is not conclusive, but it helps separate a likely single-fob problem from one affecting the vehicle as a whole.
Identify the Mercedes Key Design Before Buying a Battery
Do not select a battery from the vehicle year alone.
For this guide, common fobs are divided into three practical categories.
1. Newer tray-style Chrome SmartKey
This type generally has a metallic, chrome-style, or otherwise modern finished case. After the mechanical key and back cover are removed, a separate battery tray may slide out of the housing.
2. Older Chrome key
This also has metallic-looking trim, but its compartment may open directly rather than using the same tray arrangement. Battery count can vary among older Chrome designs.
3. Older black-plastic SmartKey
This design normally has a predominantly black plastic case. Its mechanical or valet key is removed and then used at a designated internal opening to release the backing or battery compartment. Mercedes-Benz of Ontario similarly distinguishes metal-cased Chrome SmartKeys from older plastic SmartKeys and describes different opening methods for them. Compare the two physical designs in its key-battery guide.
These categories are visual clues, not definitive fitment rules. The words “Chrome,” “SmartKey,” and “Keyless-Go” do not establish the battery size, quantity, or polarity.
Panic-button shape can provide another preliminary clue. Some instructions associate a triangular panic button on an older Chrome key with one CR2025 and a circular button with two CR2025 cells. Do not use that feature as proof; direct inspection or exact documentation must control the decision.
Use this visual decision path:
-
Inspect the case - Predominantly metallic or chrome-style: follow the Chrome-key branch. - Predominantly black plastic: compare it with the older plastic SmartKey procedure.
-
Check the panic button, if fitted - Triangular: it may suggest a one-cell older variant. - Circular: it may suggest a two-cell older variant. - No panic button or another shape: make no battery inference from it.
-
Observe how the compartment opens - Back panel releases and a tray slides out: use the tray-style procedure. - Backing or cover releases without a separate tray: use the matching older-key procedure. - Nothing releases at the expected point: stop and reassess the design instead of using more force.
-
Inspect the installed battery - Read the complete designation, such as CR2025 or CR2032. - Count the cells. - Record which face is visible. - If there are two cells, record their individual positions and arrangement.
-
Look for identifying information - Check for a battery diagram, polarity symbols, a key part number, or markings inside the compartment. - Compare that information with the owner documentation when possible.
Photograph the complete key, its mechanical-key release, and the opened compartment. The images will be more useful than the vehicle year if a tray, cover, or battery is accidentally turned during the work.
CR2025 or CR2032? Verify the Battery Instead of Guessing
CR2025 and CR2032 are the two battery designations most consistently reported in the available Mercedes key guidance, but neither is universal.
Use the following verification order:
- Check exact documentation or an unambiguous battery marking tied to the key.
- Read the complete designation on the installed cell.
- Confirm that the installed cell sits correctly and that the fob previously worked normally with it.
- Use the key’s visible part number to obtain more specific information if the first steps do not resolve the question.
The installed battery is strong practical evidence only when it appears to fit correctly and the fob previously operated with it. A previous owner or repairer could have installed the wrong cell, so clear holder markings or exact documentation should override a questionable battery.
The following table summarizes reported patterns. It is not a fitment lookup by model, year, market, or part number.
| Observed key design | Reported battery pattern | Uncertainty that must be resolved |
|---|---|---|
| Newer Chrome key with a removable cover and sliding tray | Often described as one CR2032 in post-2017-style guidance (Mercedes-Benz of Fresno) | Some Chrome-key instructions specify CR2025; inspect the installed cell and markings |
| Older Chrome key | Reported with one or two CR2025 cells (wikiHow’s variant guide) | Panic-button shape is only a clue; verify the opened holder |
| Older black-plastic SmartKey | Often described as using two CR2025 cells | The description is not universal; verify type, quantity, and arrangement inside the fob |
Published guidance conflicts even within the broad Chrome SmartKey category. For example, one dealership guide specifies one CR2025 for the design it calls a newer Chrome SmartKey, while other instructions report one CR2032 for certain newer tray-style keys. Mercedes-Benz of Hampton documents the CR2025 side of that conflict. Consequently, labels such as “newer,” “Chrome,” or “post-2017” are not sufficient by themselves.
Do not substitute one designation merely because the batteries appear to have the same diameter. Do not force a cell under a retaining contact or press a tray closed against resistance. If the replacement does not seat as the original did, remove it and recheck the designation.
Battery quantity also varies. Chrome styling and Keyless-Go branding do not establish whether a fob contains one cell or two.
For a two-cell design:
- Confirm the designation printed on both removed cells.
- Count the cells before setting them aside.
- Photograph their arrangement.
- Record the visible face of each battery.
- Check for polarity symbols in the holder.
- Reproduce the documented arrangement without assuming that both batteries face the same way.
The available evidence does not establish one stacking diagram for every two-cell Mercedes fob. Buy the replacement only after confirming the installed specification unless exact documentation tied to the key settles the question first.
Tools, Polarity, and Safe Case-Opening Preparation
Prepare a stable, well-lit work area. You will generally need:
- The verified replacement cell or cells.
- The mechanical or emergency key built into the fob.
- A clean, dry table.
- A phone or camera to record the original installation.
- An optional non-marring spudger if the matching procedure requires help lifting the battery.
Many Mercedes fobs use the mechanical key for two purposes: emergency door access and releasing the fob’s cover or compartment. Use it only at the intended opening or latch. Do not search for a weak point by prying around the outside seam.
Before removing the old battery:
- Support the fob over the table so a tray, cover, or cell cannot disappear if it falls.
- Photograph the battery while it is still installed.
- Record which marked face is visible.
- Look for
+and−symbols inside the holder. - If two cells are present, document each position separately.
There is no universal “positive side up” rule. Published procedures include positive-up and positive-down examples for different variants, including different directions among newer Chrome-key designs. Follow clear holder markings or copy a verified original installation rather than relying on a generic video.
Use only the tool and opening method appropriate to the matching fob. A user-contributed iFixit procedure specifies a CR2025, the mechanical key, and a spudger and estimates the illustrated task at one to four minutes, but its broad 2006–2015 compatibility description should not be treated as universal. Use the iFixit procedure only if your fob physically matches its illustrations.
Keep the compartment dry and avoid disturbing the electronic components. Do not bend, scrape, or otherwise modify battery contacts. If the contacts are broken, the buttons are damaged, or the fob has been wet, stop and arrange professional inspection; continued failure after replacement can result from damaged contacts or buttons. Mercedes-Benz of Barrington identifies both as post-replacement possibilities.
Coin-cell precaution: Keep new and used cells secured and away from children and pets. Make sure the battery cover closes fully before returning the fob to use, and store used cells securely until they can be handled under local battery-disposal or recycling rules.
If the case does not release with controlled pressure:
- Confirm that the mechanical key is fully removed.
- Locate the actual internal release or latch.
- Check whether the design uses a sliding tray.
- Revisit the physical identification rather than increasing leverage.
Replacing a Newer Tray-Style Chrome SmartKey Battery
Use this procedure only if the fob has the matching cover-and-tray arrangement.
-
Place the fob face-down on the table. Position it so you can operate the release without dropping the mechanical key.
-
Operate the release and remove the mechanical key. Depending on the variant, the release may slide or press. Pull the key straight from its storage channel.
-
Find the designated cover release. Insert or press the mechanical key at the intended narrow opening or internal release point. Do not work it around the whole case seam.
-
Remove the back cover carefully. Lift or slide it in the direction allowed by its tabs. Note how those tabs engage the fob body.
-
Slide out the battery tray, if present. Pull it evenly and keep it level. Photograph the installed cell before moving it.
-
Verify the battery. One CR2032 is commonly reported for certain post-2017 tray-style Chrome keys, but other Chrome-key guidance specifies CR2025. Published polarity directions also vary by design, including positive-down and positive-up examples. The variant distinctions are documented in wikiHow’s Chrome-key guide.
-
Remove and replace the cell. Install the exact verified designation. Follow the tray’s polarity symbols or reproduce the documented original orientation.
-
Return the tray fully. Slide it straight into the housing. If it does not return to its normal position, remove it and inspect the battery seating rather than pushing harder.
-
Refit the cover. Align its tabs and press it into place until the edges sit evenly. Reopen the fob if the cover will not close normally.
-
Reinstall the mechanical key. Insert it until its release locks and the key remains securely stored.
Test the fob beside the vehicle:
- Lock and unlock the doors.
- Test the trunk release.
- Test the panic button where fitted and safe to use.
- Check keyless entry or key recognition.
- Move away gradually to assess remote range.
If the fob remains unresponsive, verify the battery designation, polarity, seating, and case closure before considering synchronization or programming.
Replacing Batteries in Older Chrome and Black-Plastic SmartKeys
Older Chrome keys and black-plastic SmartKeys use similar principles, but their release points and battery arrangements can differ. Do not combine instructions from fobs that only look approximately alike.
Older Chrome key
- Place the fob on a stable surface.
- Operate the release at the bottom or end.
- Withdraw the mechanical key.
- Use the key at the designated slot or flat release point.
- Release and remove the battery cover.
- Inspect and photograph the compartment before removing a cell.
Confirm whether the fob contains one or two batteries. A triangular panic button may suggest a one-cell variant and a circular button a two-cell variant, but the holder and exact documentation are more authoritative.
If the installed cells are CR2025 batteries, replace them with the same designation and quantity while preserving their documented orientation. If the batteries carry another designation, stop and obtain that specification rather than relying on the broad key category.
Older black-plastic SmartKey
- Locate the sliding or pull-type release at the end of the fob.
- Hold the release while withdrawing the valet or mechanical key.
- Find the designated internal opening for the battery backing.
- Use the mechanical key at that opening to operate the release.
- Remove the backing or draw out the compartment without forcing the outside seam.
- Record the battery type, count, and orientation.
- Install matching cells in the same verified arrangement.
Older black-plastic SmartKeys are often described as using two CR2025 batteries, but that is not a universal specification. Mercedes-Benz of Daytona Beach’s guide characterizes them as often using two CR2025 cells while advising owners to inspect the existing battery because Chrome designs may use CR2025 or CR2032. Review its design and battery distinctions.
For either older design:
- Confirm that every cell is seated in its intended position.
- Align the cover before pressing it closed.
- Check that the cover sits evenly.
- Reinsert the mechanical key until it locks.
- Test every remote button before leaving the work area.
Immediate testing makes it easier to reopen the fob and correct the installation if a function remains unavailable.
What to Do When the Fob Battery Is Dead
A dead coin cell does not necessarily leave you locked out. The removable mechanical key may provide emergency access to the driver’s door when remote locking is unavailable.
Remove the mechanical key using the fob’s release, then consult the vehicle owner’s manual for the location and operation of the mechanical door lock.
Emergency door entry and engine-start authorization are separate functions. A mechanical blade may open the door without determining whether the electronic key will be recognized for starting.
A W220 S-Class forum discussion provides a useful but tightly limited example. Participants describe the W220-era coin cells as powering remote functions while the Electronic Ignition System supplies inductive power for ignition authorization. In the reported 2004 S500 case, the key began turning after the vehicle battery was charged. The W220 thread documents the owner’s discharged-battery finding and the system explanation.
That W220 account should not be generalized to every Mercedes key or start-button system. Therefore:
- Do not assume a dead fob battery always prevents starting.
- Do not assume every Mercedes will start normally with a dead fob battery.
- Do not use a generic push-button emergency-start sequence from another model.
- Follow the exact vehicle manual.
If an inserted ignition key will not turn, the starter will not operate, or the vehicle appears electrically dead, check the vehicle’s 12-volt battery. If vehicle power is normal and the problem continues, the key or access and ignition systems may require diagnosis.
Troubleshooting After Replacement and Knowing When to Get Help
If a fresh battery does not restore operation, check the installation before assuming the key requires programming.
1. Confirm the designation
Remove the new battery and read its complete label. Compare it with clear holder markings, exact documentation, or a correctly fitted battery that previously powered the fob.
2. Confirm the quantity
Check that the number of installed cells matches the holder’s documented arrangement. Never add a second battery to a compartment designed for one.
3. Check polarity
Compare the installation with your photograph and any + or − markings. Do not assume that the printed positive face always points toward the cover.
4. Reseat the battery
Confirm that the cell lies in the intended holder position and under the correct retaining points. If it does not sit as the original did, remove it and reassess the designation and orientation.
5. Inspect the case closure
Check that the tray is returned to its normal position and that the cover closes evenly. Reopen the case if it will not close without additional force.
6. Consider the replacement cell
A newly purchased cell may still fail to restore operation. If the specification and installation are correct, a second verified cell can help distinguish a battery problem from a fob fault. The evidence does not establish that any particular brand is mandatory.
7. Inspect without modifying
Look for:
- Dirty, flattened, loose, or broken contacts.
- Moisture or residue.
- A cracked or impact-damaged case.
- A jammed or continuously depressed button.
- A tray that no longer remains in position.
Do not bend contacts or scrape the electronics. Dealership guidance recommends professional assistance when a fob remains inoperative, is wet or damaged, or has persistent warnings after a fresh battery is installed. Mercedes-Benz of Hoffman Estates outlines these inspection and escalation points.
8. Retest near the vehicle
Stand beside the driver’s door and test lock and unlock before checking key recognition. This reduces operating distance as a variable during the first test.
9. Compare the spare key
If the spare works, concentrate on the primary fob’s installation, contacts, buttons, and internal electronics. If both fail, consider interference, the vehicle battery, receiver or antenna problems, access-control modules, or another electrical fault.
10. Evaluate persistent warnings cautiously
A warning may not disappear immediately after installation. In a W177 A-Class owner discussion, one participant reported that the warning cleared after the batteries were changed and the vehicle was driven; another case was resolved after a dealer installed a different battery. These are model-specific user reports, not a universal reset time or procedure. The W177 thread records both outcomes.
Battery replacement, remote re-synchronization, and key programming are different tasks:
- Battery replacement restores power to an existing fob.
- Re-synchronization may restore remote operation on a system with a model-specific procedure.
- Programming or coding authorizes a replacement or otherwise unrecognized key.
Do not follow an unverified synchronization sequence from another generation, and do not remove or change the battery while the engine is running. Follow the exact owner documentation or seek qualified assistance.
Arrange model-specific diagnosis when:
- Both keys fail.
- Key Not Detected persists with a correctly installed fresh battery.
- A battery warning does not clear.
- The fob has been wet.
- Contacts are loose, corroded, or broken.
- The case or buttons are physically damaged.
- An ignition key will not turn.
- The vehicle has slow cranking, dim electrical equipment, or other vehicle-battery symptoms.
- The tray or cover cannot be opened or closed without force.
Frequently Asked Questions
Does a Mercedes key use a CR2025 or CR2032 battery?
It may use either. Mercedes key guidance repeatedly identifies CR2025 and CR2032 cells, but the correct designation depends on the exact fob. Older designs may also use more than one cell. Mercedes-Benz of Hoffman Estates identifies both recurring battery types.
Use exact documentation or compartment markings when available. Otherwise, inspect a correctly fitted battery that previously powered the fob. Do not decide from the Mercedes name, model year, Chrome finish, or SmartKey label alone.
Does a Mercedes key need reprogramming after a battery change?
W177 A-Class forum participants report replacing CR2032 batteries without recoding, but that user-generated, model-specific experience does not prove that every Mercedes behaves identically. See the W177 battery-replacement discussion.
If the key remains unrecognized after the correct battery is installed, check the installation and consult the vehicle manual. Do not use a generic online reprogramming or synchronization sequence from a different generation.
Which side of the Mercedes key battery faces up?
There is no universal direction. Variant-specific guidance includes both positive-side-up and positive-side-down installations, even among newer Chrome keys.
Photograph the original battery before removal and follow visible polarity markings. With a two-cell design, document each battery’s position rather than assuming a universal stacking pattern.
Can I unlock or start my Mercedes if the key-fob battery is dead?
The removable mechanical key may let you unlock the driver’s door. Consult the vehicle manual because the location and operation of a concealed mechanical lock vary.
Starting is a separate question. W220 forum participants describe ignition authorization on that system as inductively powered rather than powered by the fob’s button cells, but the description is limited to the discussed W220-era system. The W220 troubleshooting thread explains that distinction.
Do not generalize that behavior to every Mercedes generation. Follow the vehicle’s exact emergency-start instructions, and check the vehicle battery if the car appears electrically dead or an inserted ignition key will not turn.
Why does my Mercedes key still not work after battery replacement?
Possible installation or fob problems include:
- Incorrect battery designation.
- Incorrect cell count.
- Reversed polarity.
- Poor seating.
- A tray or cover that is not correctly returned.
- A weak replacement cell.
- Dirty, loose, or broken contacts.
- Moisture, impact, case, or button damage.
Recheck those items and test the spare key. If both keys fail, interference or a vehicle-side fault becomes more plausible. Dealership guidance identifies the vehicle battery, antennas, modules, and fob damage among the alternative areas to investigate.
Final Verify–Replace–Test Checklist
Before closing the job:
- Identify the physical fob rather than relying on the vehicle year.
- Check exact documentation or holder markings.
- Read the installed battery designation.
- Record the battery count and polarity.
- Use the mechanical key only at the intended release point.
- Install matching cells without forcing the holder.
- Close the tray and cover evenly.
- Reinstall the mechanical key securely.
- Test every remote and recognition function near the vehicle.
CR2025 versus CR2032 cannot be settled safely by the words “Mercedes,” “Chrome,” or a model year alone. If a correctly installed fresh battery does not solve the problem—especially when both keys fail or the vehicle has ignition or electrical symptoms—stop repeating the battery replacement and move to model-specific diagnosis of the key, vehicle battery, and access or ignition system.