
8 min read ·
Replace Your BMW Key Fob Battery Safely
Identify your BMW key design, confirm its coin-cell code, install the battery correctly, and fix common key-detection problems after replacement.
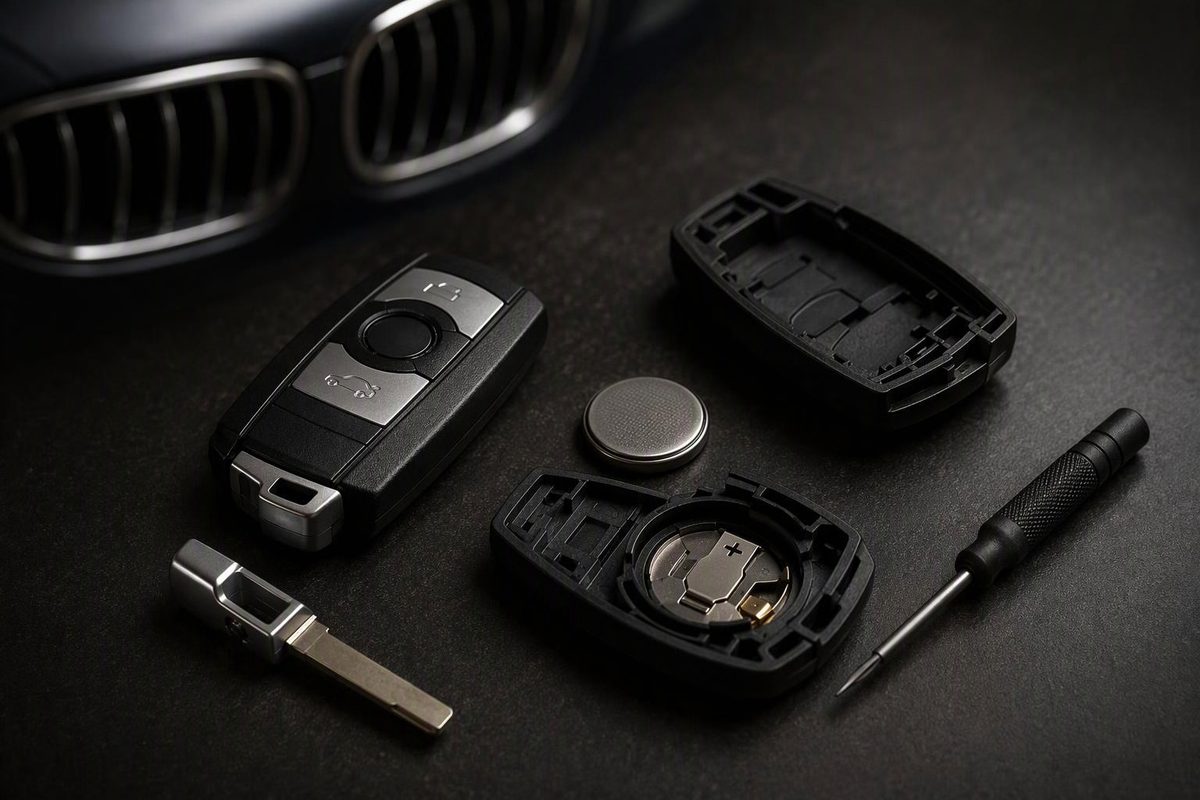
Do not buy a battery from the BMW model name alone. To replace a BMW key fob battery, first confirm that the fob has a removable emergency key and a separate battery cover, then install a new cell with the exact code and orientation shown on the old one. Recharge a Display Key instead, and do not cut open an older sealed rechargeable key.
For the exact specification, use BMW’s VIN-specific digital owner’s manual. If the manual does not settle the question, remove only the intended battery cover and read the complete code on the installed cell before buying a replacement.
Select the physical key design in your hand to see the correct next step.
BMW Key Type Selector
Choose by the key’s physical design, not the vehicle model name.
Open only the separate battery cover. Read the complete code on the old coin cell and install an exact match in the same orientation.
All Three Outcomes
Sources: BMW USA owner’s manual and key FAQs; BMW dealer battery guidance cited in the article.
Identify the Key Before Opening It
The shape of the physical key matters more than the vehicle badge, model or model year. BMW has used conventional replaceable-cell fobs, rechargeable Display Keys and sealed keys that are not intended for an ordinary coin-cell replacement.
| Key design | Correct action |
|---|---|
| Conventional fob with a removable emergency key and separate rear cover | Open that cover and replace the marked coin cell. |
| Display Key with a screen | Charge it; do not pry open the case. |
| Older sealed or diamond-shaped key with no battery door | Stop before cutting or forcing the case. |
A conventional fob usually gives two clear clues: a release for the integrated metal key and a distinct rear panel with a notch or access point. The battery compartment is behind that panel. The decorative seam around the body of the remote is not necessarily an opening point.
A Display Key is identified by its screen. BMW says the Display Key can charge in the vehicle’s wireless charging tray or through the micro-USB port on its left side. Prying at its case is not the equivalent of opening a conventional fob’s battery door. (BMW USA)
An older sealed or diamond-shaped key may contain an internal rechargeable battery. If there is no intended battery cover, routine coin-cell instructions do not apply. Cutting or forcing the shell can damage the case, internal components or key electronics. Treat the absence of a battery door as a reason to stop, not as a reason to search for a more forceful prying point.
Match the Complete Battery Code
CR2032 is common, but it should not be assumed for every BMW key. BMW USA documents a single CR2032 for its current illustrated replacement procedure, while BMW dealer guidance also identifies some replaceable-cell fobs that use CR2450 batteries. Those references do not establish one battery type for every BMW key. (BMW USA, BMW of Bloomington)
Read the full code printed on the old battery. Do not match a replacement by diameter alone. Cells that look similar can differ in thickness or specification, and a cell that does not match the compartment may sit poorly beneath the contacts or prevent the cover from closing correctly.
If the old marking is difficult to read, check the owner’s manual before discarding the battery. Keep the removed cell beside the fob until the replacement has been installed and tested. That preserves both pieces of information needed during reassembly: the full battery code and the direction each face was installed.
The original orientation is as important as the code. Before lifting the battery out, look for a polarity mark in the compartment and note which marked face of the cell points outward. A quick phone photo provides a reference if the molded marking is small or unclear.
Replace the Coin Cell Without Forcing the Case
Work over a clear table so the battery and emergency key cannot fall into a seat rail, floor vent or drain. Set the new battery nearby, but leave the old cell in place until its code and orientation have been recorded.
-
Remove the integrated key. Press the release button or tab, then pull out the metal emergency key. Do not twist it against the fob if it does not slide free; keep the release fully depressed while pulling in the direction intended by the key channel.
-
Locate the battery cover. Look for the separate rear panel and its notch, usually in or beside the opening left by the emergency key. Trace the outline of that panel before applying pressure so you do not confuse it with the decorative outer seam.
-
Open only that cover. Use the integrated key or a small flat screwdriver at the intended notch. Apply light, controlled pressure. Work from the access point rather than prying around the whole perimeter, which can mark the shell or damage clips that were not meant to release first.
-
Stop if there is no separate cover. A sealed rechargeable key is a different design. Do not cut the shell or force a tool into a seam merely because a conventional-fob guide shows a replaceable coin cell.
-
Record the cell code and orientation. Read the complete marking, such as CR2032 or CR2450, and note which face is outward. Photograph the installed cell if the compartment does not have a clear polarity mark.
-
Remove the old cell. Ease it out from beneath the retaining clips without bending the contacts. Apply pressure only where needed to release the edge. Avoid touching both battery faces at once with a metal tool.
-
Inspect the compartment. Confirm that the retaining contacts remain in their original positions and that no loose material is trapped beneath them. Do not flatten, stretch or reshape a contact simply to make a mismatched battery fit.
-
Install the exact replacement. Match the complete battery code and the original polarity. Slide or press the cell beneath the retaining features in the same manner as the old one. It should sit evenly in the compartment rather than balancing on a contact or protruding above the intended position.
-
Close the cover. Align its tabs before pressing down. Apply even pressure until the clips sit flush. If one side remains raised, remove the cover and check the tab alignment and battery seating instead of squeezing harder.
-
Reinstall the emergency key. Return it to its channel and make sure it is retained normally. BMW’s documented CR2032 procedure specifies returning the new cell to the same position and closing both parts until they click. (BMW USA)
-
Test at the vehicle. Check lock, unlock and the trunk or tailgate button. Then verify that the vehicle detects the key for normal operation.
If the battery cover will not close flush, reopen it. The likely issues to check are a battery that is not beneath its retaining clips, a cover tab that missed its slot or a cell that does not match the required code. Forcing the cover can hide the problem while placing pressure on the battery, contacts or plastic clips.
A Battery Change Usually Does Not Require Pairing
Changing the replaceable coin cell normally does not mean replacing or pairing the key. If a previously working fob stopped when its battery became weak, first recheck the replacement cell, polarity, seating and contacts before treating the problem as a programming failure.
Test the buttons close to the vehicle and confirm that more than one function works. A single unresponsive button can indicate a different fob problem than complete loss of power. If available, compare the result with the spare key. A working spare helps separate a fault in one remote from a problem affecting the vehicle’s key detection.
Do not repeatedly remove and reinstall the new battery without checking the basics. Each reopening creates another opportunity to bend a contact, misalign the cover or lose track of the correct orientation. Reopen the fob once, compare it with the recorded photo or compartment mark, and correct the specific issue found.
Check the Installation If the Key Is Not Recognized
Reopen the fob and inspect these points in order:
- Confirm that the battery code exactly matches the removed cell.
- Confirm that its polarity matches the original installation or compartment marking.
- Make sure the cell is fully beneath the retaining contacts rather than resting on top of one.
- Remove any packaging film left on the replacement battery.
- Check that the cover is fully seated and that no contact was bent or flattened during removal.
- Test the spare key, if available, to help distinguish a problem with one fob from a vehicle-side fault.
A battery can look installed while failing to make reliable contact. Compare how the new cell sits with the photo taken before removal. If it is tilted, loose or visibly higher than the old battery, do not use the cover to push it into place. Remove it and reseat it beneath the intended retaining points.
If the buttons operate but the vehicle reports that the key is not recognized, move phones, charging devices, metal objects and other possible sources of interference away from the key. BMW also identifies powerful radio transmitters as a possible source of interference. (BMW USA)
For BMWs equipped with a key-detection mark on the steering column, hold the rear of the fob against that mark. If the key is detected, switch on the drive-ready state within 10 seconds. This is a recognition procedure for vehicles with that feature, not evidence that every BMW uses the same emergency starting method.
Know When the Fob Needs Diagnosis
Seek key or electrical diagnosis if the case is cracked, the contacts are damaged or corroded, the Display Key will not charge, or both keys fail. A loose or broken internal contact cannot be corrected by trying additional coin cells.
A replacement remote must be matched to the vehicle. Repeated battery changes will not correct a damaged or unrecognized key. If one key works and the other does not after the correct battery has been installed, bring both the vehicle details and the affected key when arranging diagnosis so the problem is not mistaken for a general vehicle battery or receiver fault.
Do not convert a sealed rechargeable key into a do-it-yourself coin-cell project by cutting its shell. The repair path for that design is different from opening a purpose-built battery cover, and the ordinary replacement steps above end once the absence of a cover has been confirmed.
Handle the Removed Coin Cell Safely
Keep loose coin cells away from children. The U.S. Consumer Product Safety Commission warns that a swallowed coin battery can burn through a child’s throat or esophagus in as little as two hours. If a battery may have been swallowed, seek medical help immediately. (CPSC)
Do not leave the old cell loose on a table, in a cup holder or in a pocket with metal objects. Tape over its terminals after removal and take it to a battery-collection center. Keep the replacement package and the discarded cell controlled throughout the job, especially if children can enter the work area.